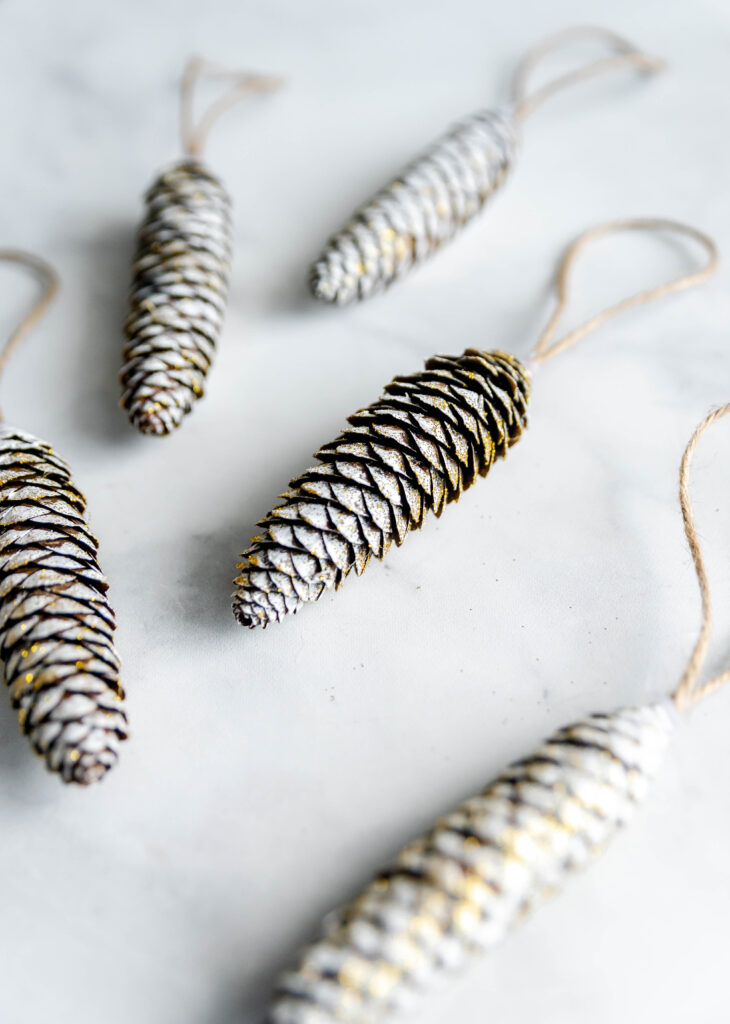
How to Make White Pine Cone Ornaments

These pine cone ornaments are beyond simple to make and don’t take much time. All you need to do is head to your back yard or the nearest park, collect some pine cones, and work some magic!
If you’re looking to add a personal touch to your Christmas tree but don’t want to do something overly complicated, you’ve come to the right place! Pine cone Christmas ornaments are a sweet (yet super simple) way to add a little natural beauty to your holiday decor.
What I love most about this project is that it is quick and easy, especially if you are using quick-dry paint. As a mom of two littles, I don’t have a ton of time on my hands. But, I LOVE a good DIY project, like making my own ornaments instead of buying them!
If you’re looking for more homemade ornament ideas, check out our Pipe Cleaner Wreath Ornaments or our DIY Candy Cane Christmas Ornaments, which are also a piece of cake and kid friendly.
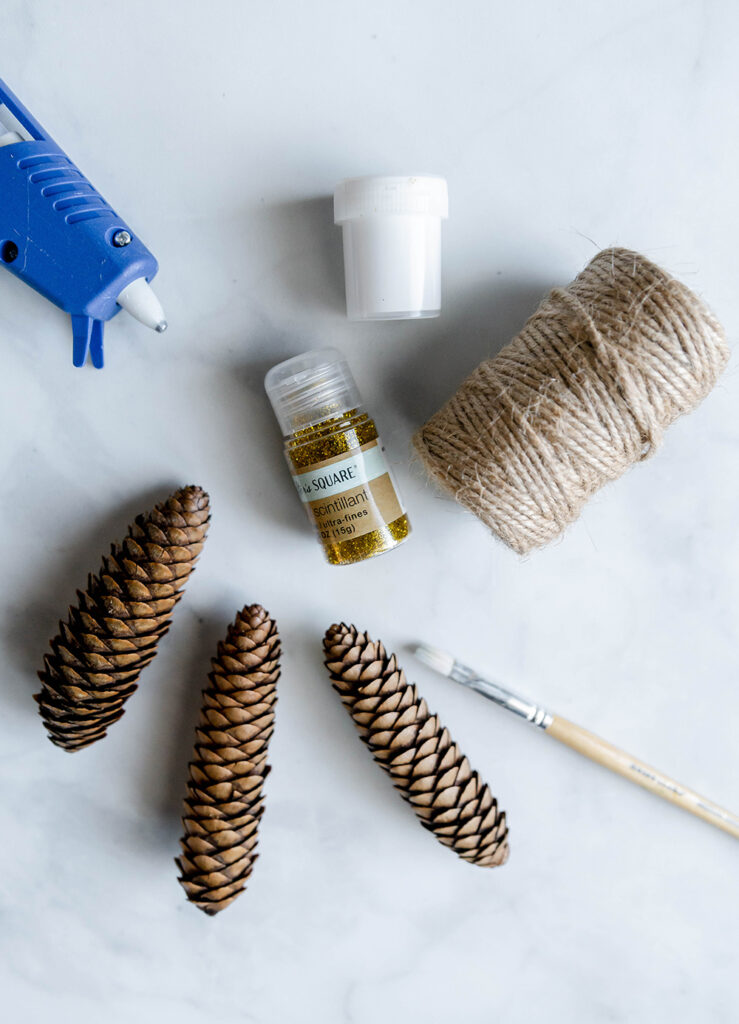
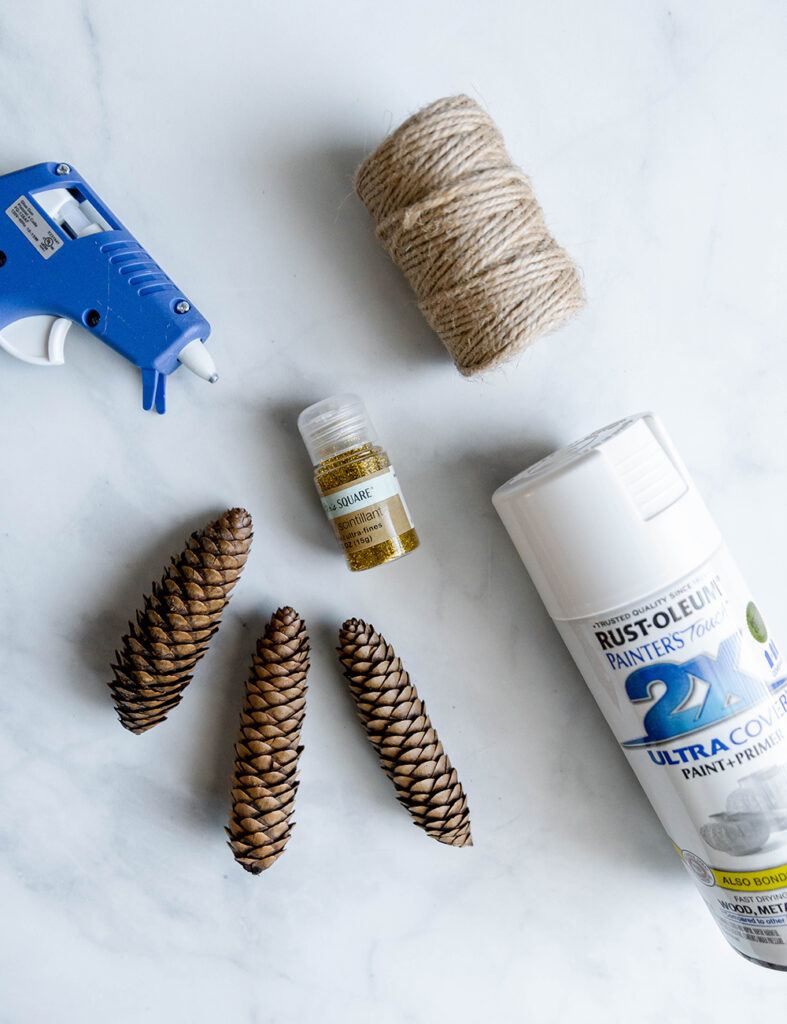
What you’ll need for our pine cone ornaments:
- pine cones
- white acrylic paint OR white spray paint
- paint brush (if hand painting)
- gold glitter
- twine
- hot glue gun
How to Make Pine Cone Ornaments
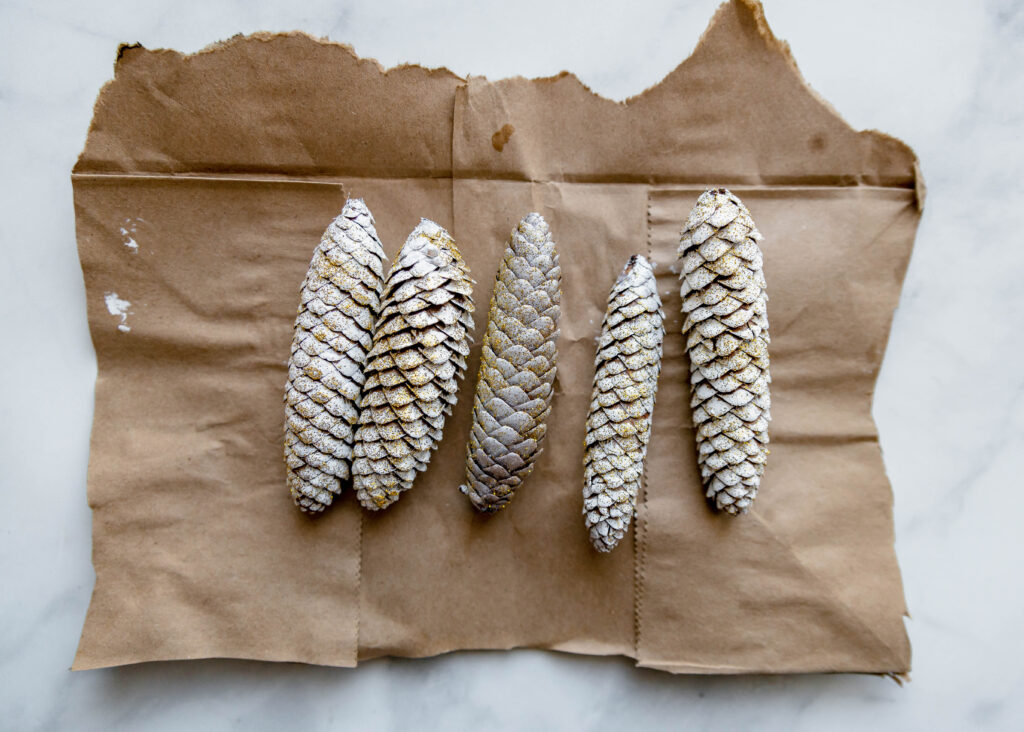
**TIP: Do one pine cone at a time, repeating steps 1 and 2 so the paint is still wet enough for the glitter to stick, rather than painting all your pine cones at once.
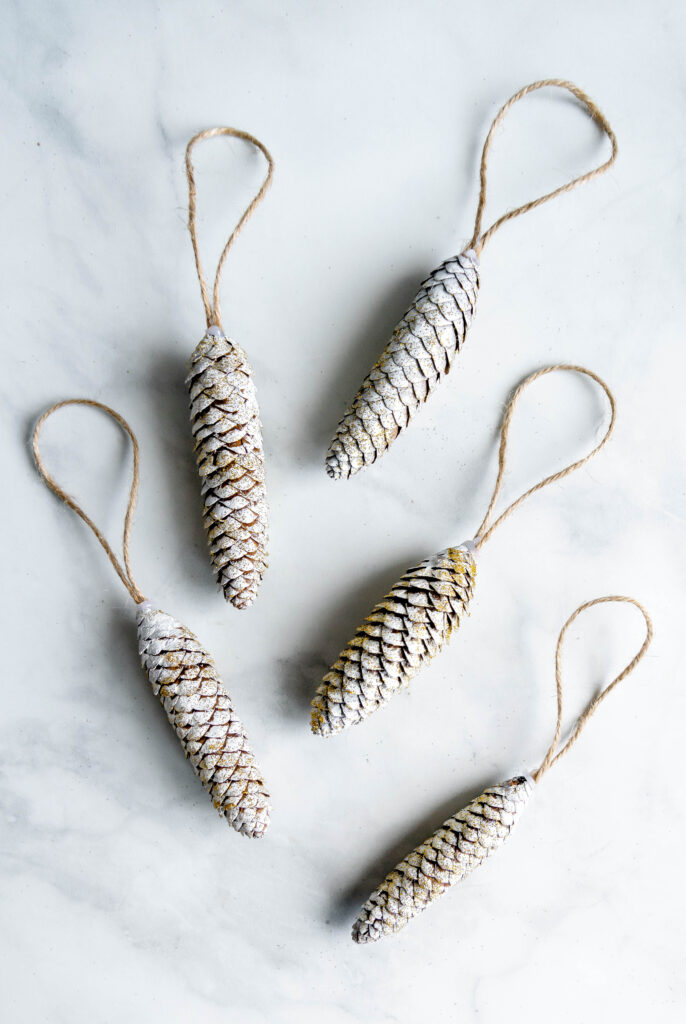
Step 1: Paint your pine cones on all sides.
If you are using spray paint (pictured left), be sure to put down protection for your surface. I used a paper bag. You may opt to do this outside because the smell can be a little strong.
If you are using acrylic paint and a brush (pictured right), stroke in an upward motion with the grain and leave the inner portions unpainted. This will give you a little more depth in your presentation.
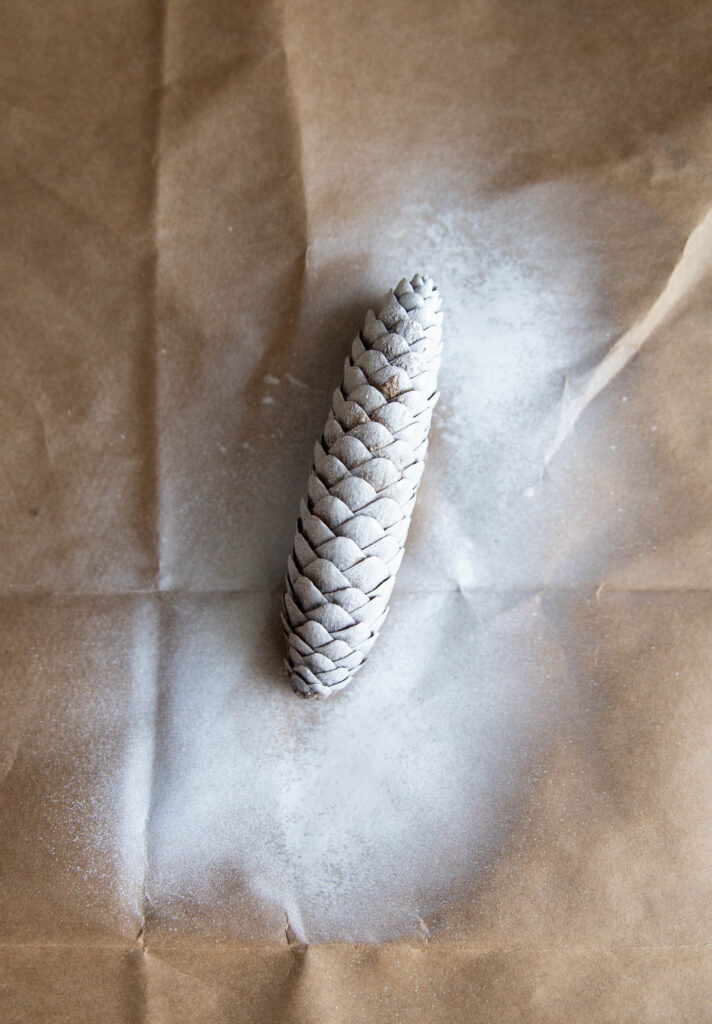

I found the spray paint produced a little more of a lighter brushed appearance and painting with a brush gave a thicker, more bold appearance.
Step 2: Add your gold glitter while the paint is still wet by lightly sprinkling it on while rotating.
Once you have repeated steps 1 and 2 on all your pinecones, set them aside to dry.
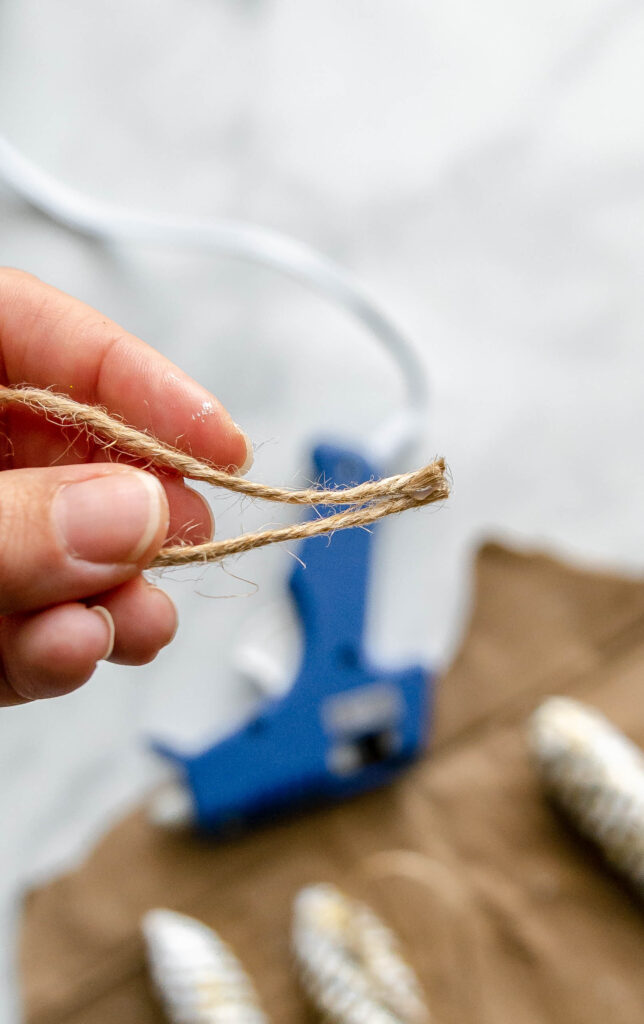
Step 3: While the pine cones are drying, cut your twine into 8-inch pieces.

Step 4: Using your hot glue gun, glue both ends of your cut twine together to create a loop. I found that gluing them together before attaching them to the pine cone held everything together better and made for a cleaner appearance.
Step 5: Once the glue has settled on the ends of the twine and your pinecones are dry, put a generous amount of hot glue on the very tip of your loop. Press this into the top of the pinecone. Repeat for all pinecones and set aside to dry!

If you make this DIY ornament project, I would love to see! Feel free to tag us on Instagram (@my_craftymama).